


Help Center
Adobe Photoshop Help
Step 1: Creating a New Document
After launching your Photoshop application,
- Choose File > New... (See Figure 1)
Keyboard Shortcut: Ctrl+N for PC users, Cmd+N for Mac users
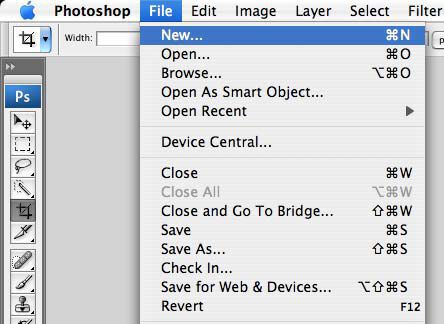
Figure 1
When the New window appears, (See Figure 2)
- Set the Resolution (raster effects) to 300 DPI.
- Set the Color Mode to CMYK.
- Set the Width & Height of your artwork to the bleed size of the product you are creating.
- You can refer to this this table for a quick list of product sizes and the bleed size to submit.
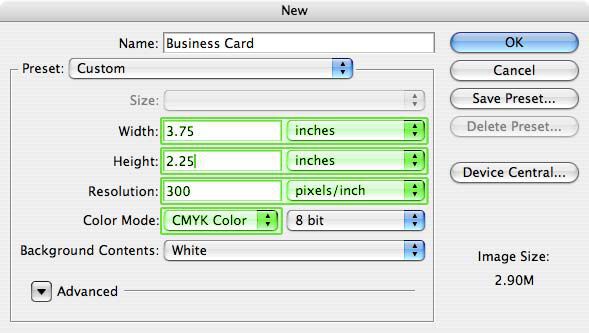
Figure 2
Step 2: Saving your Files
When you have completed your design, and checked it against the guidelines above,
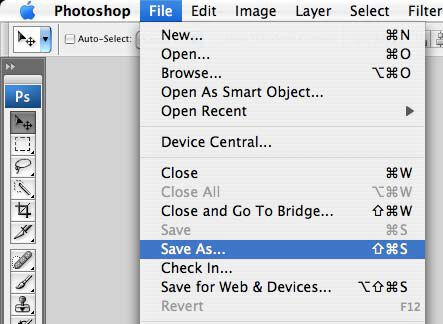
- Choose File > Save As... (See Figure 9)
When the Save As box appears (See Figure 10)
- Enter a filename for your design.
- Select TIFF (*.tif) as your filetype. You may also save your files as a JPG, but this tends to reduce the quality of your artwork and is not recommended.
- Uncheck the Layers checkbox, so that your exported artwork is flattened. Flattening your artwork ensures the appearance of your layers is preserved.
- Check the Save as a Copy checkbox Save the flattened artwork with a new filename, this will ensure you do not overwrite your layered source file.
- Click Save to proceed.
